
1. 스프링 애너테이션이란?
스프링 2.5까지는 DI와 AOP같은 기능은 XML에 설정해서 사용했다. 하지만 애플리케이션의 기능이 복잡해짐에 따라 XML설정 파일의 내용도 복잡해지고, 관리의 문제가 생기기 시작했다.
그래서 스프링 3.0부터는 DI 같은 자바 코드와 관련된 설정은 직접 코드에서 할 수 있게 애너테이션이라는 기능을 제공한다.
1) 스프링 애너테이션 제공 클래스
| 클래스 | 기능 |
| DefaultAnnotationHandlerMapping | 클래스 레벨에서 @RequestMapping을 처리 |
| hodHandlerAdapter | 메서드 레벨에서 @RequestMapping을 처리 |
2) <context:component-scan> 태그 기능
<context:component-scan> 태그를 사용해 패키지 이름을 지정하면 애플리케이션 실행 시 해당 패키지에서 애너테이션으로 지정된 클래스를 빈으로 만들어준다.
<context:component-scan base-package="패키지이름" />
여러가지 스테레오 타입 애너테이션
| 애너테이션 | 기능 |
| @Controller | component-scan에 의해 지정한 클래스를 컨트롤러 빈으로 자동 변환 |
| @Service | component-scan에 의해 지정한 클래스를 서비스 빈으로 자동 변환 |
| @Repository | component-scan에 의해 지정한 클래스를 DAO 빈으로 자동 변환 |
| @Component | component-scan에 의해 지정한 클래스를 빈으로 자동 변환 |
2. 스프링 애너테이션 이용해 URL 요청 실습하기
action-servlet.xml
<?xml version="1.0" encoding="UTF-8"?>

<beans xmlns="http://www.springframework.org/schema/beans"
	xmlns:p="http://www.springframework.org/schema/p"
	xmlns:aop="http://www.springframework.org/schema/aop"
	xmlns:context="http://www.springframework.org/schema/context"
	xmlns:xsi="http://www.w3.org/2001/XMLSchema-instance"
	xsi:schemaLocation="http://www.springframework.org/schema/beans
	http://www.springframework.org/schema/beans/spring-beans-3.0.xsd
	http://www.springframework.org/schema/aop
	http://www.springframework.org/schema/aop/spring-aop-3.0.xsd
	http://www.springframework.org/schema/context
	http://www.springframework.org/schema/context/spring-context-3.0.xsd">

	<bean
		class="org.springframework.web.servlet.view.InternalResourceViewResolver">
		<property name="prefix" value="/WEB-INF/views/test/" />
		<property name="suffix" value=".jsp" />
	</bean>

	<!-- 클래스 레벨에 @RequestMapping을 처리 -->
	<bean class="org.springframework.web.servlet.mvc.annotation.DefaultAnnotationHandlerMapping" />
	<!-- 메서드 레벨에 @RequestMapping을 처리 -->
	<bean class="org.springframework.web.servlet.mvc.annotation.AnnotationMethodHandlerAdapter" />
	<!-- com.spring패키지에 존재하는 클래스에 애너테이션이 적용되도록 설정 -->
	<context:component-scan base-package="com.spring" />
</beans>
MainCotroller.java
// 애너테이션이 적용되도록하려면 해당 클래스가 반드시 <component-scan>에서 설정한 패키지나 하위 패키지에 존재해야한다
package com.spring.ex01;

import javax.servlet.http.HttpServletRequest;
import javax.servlet.http.HttpServletResponse;

import org.springframework.stereotype.Controller;
import org.springframework.web.bind.annotation.RequestMapping;
import org.springframework.web.bind.annotation.RequestMethod;
import org.springframework.web.servlet.ModelAndView;

// @Controller 애너테이션을 이용해 MainController 클래스를 빈으로 자동 변환. 빈 id는 mainController
@Controller("mainController")
// @RequestMapping을 이용해 첫 번째 단계의 URL 요청이 /test이면 mainController 빈을 요청
@RequestMapping("/test")

public class MainCotroller {
	// @RequestMapping을 이용해 두번째 단계의 URL 요청이 /main1.do면 mainController 빈의 main1()메서드에게 요청
	@RequestMapping(value="/main1.do" , method=RequestMethod.GET)
	public ModelAndView main1(HttpServletRequest request,
			HttpServletResponse response) throws Exception {
		ModelAndView mav = new ModelAndView();
		mav.addObject("msg", "main1");
		mav.setViewName("main");
		return mav;
	}

	// method=RequestMethod.GET으로 지정하면 GET방식으로 요청시 해당 메서드가 호출
	@RequestMapping(value="/main2.do", method = RequestMethod.GET)
	public ModelAndView main2(HttpServletRequest request,
			HttpServletResponse response) throws Exception {
		ModelAndView mav = new ModelAndView();
		mav.addObject("msg", "main2");
		mav.setViewName("main");
		return mav;
	}
}
@controller("mainController") 애너테이션은 주로 Controller 클래스에 위치해 빈을 만든다. @RequestMapping("/test")은 URL 요청시 첫번째 단계의 요청이 /test이면 mainController 빈에게 요청을 전달한다. 그리고 @RequestMapping(value="/main1.do", method=RequestMethod.GET)을 메서드에 위치시킨 후 요청을 구분하여 메서드를 호출한다.
main.jsp
<%@ page language="java" contentType="text/html; charset=UTF-8"
    pageEncoding="UTF-8"
    isELIgnored="false"  %>
 <%@ taglib prefix="c" uri="http://java.sun.com/jsp/jstl/core"  %>


<%
  request.setCharacterEncoding("UTF-8");
%>


<html>
<head>
<meta charset=UTF-8">
<title>결과창</title>
</head>
<body>
<h1>안녕하세요!!</h1>
<h1>${msg} 페이지입니다!!</h1>
</body>
</html>
결과화면


3. 스프링 애너테이션 이용해 로그인 기능 구현하기
web.xml
@Controller("loginController")
public class LoginController {
	// /test/loginForm.do와 /test/loginform2.do로 요청시 loginForm()을 호출
	@RequestMapping(value = { "/test/loginForm.do", "/test/loginForm2.do" },
    	method={RequestMethod.GET})
	public ModelAndView loginForm(HttpServletRequest request,
    	HttpServletResponse response) throws Exception {
            ModelAndView mav = new ModelAndView();
            mav.setViewName("loginForm");
            return mav;
	}

	// GET, POST 요청 처리
	@RequestMapping(value = "/test/login.do",
    	method={RequestMethod.GET, RequestMethod.POST})
	public ModelAndView login(HttpServletRequest request,
    	HttpServletResponse response) throws Exception {
            request.setCharacterEncoding("utf-8");
            ModelAndView mav = new ModelAndView();
            mav.setViewName("result");
            String userID = request.getParameter("userID");
            String userName = request.getParameter("userName");
            mav.addObject("userID", userID);
            mav.addObject("userName", userName);
            return mav;
	}
}
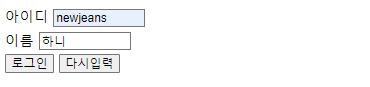
loginForm.jsp
<!-- 로그인 클릭시 /test/login.do로 요청 -->
<form method="post"  action="${contextPath}/test/login.do">
	<table width="400">
		<tr>
			<td>아이디 <input type="text" name="userID" size="10"></td>
		</tr>
		<tr>
			<td>이름 <input type="text" name="userName" size="10"></td>
		</tr>
	    <tr>
			<td>
			  <input type="submit" value="로그인">
			  <input type="reset" value="다시입력">
			</td>
		</tr>
	</table>
</form>
result.jsp
<body>
<h1>아이디 : ${userID }</h1>
<h1>이름   : ${userName }</h1>
<%-- <h1>아이디 : ${info.userID }</h1>
<h1>이름   : ${info.userName }</h1> --%>
</body>
결과화면

1) 메서드에 @RequestParam 적용
지금까지는 브라우저에 매개변수를 전송하면 getParameter() 메서드를 이용해 값을 얻었다. 하지만 매개변수가 많아지면 getParameter() 메서드를 이용하는 방법은 힘들다.
@requestParam을 메서드에 적용해 쉽게 값을 얻는 방법을 확인해보자
LoginController.java
...
@RequestMapping(value = "/test/login2.do", method = { RequestMethod.GET, RequestMethod.POST })
public ModelAndView login2(@RequestParam("userID") String userID,
@RequestParam("userName") String userName,
HttpServletRequest request, HttpServletResponse response) throws Exception {
request.setCharacterEncoding("utf-8");
ModelAndView mav = new ModelAndView();
mav.setViewName("result");
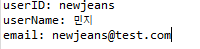
System.out.println("userID: "+userID);
System.out.println("userName: "+userName);
mav.addObject("userID", userID);
mav.addObject("userName", userName);
return mav;
}
@RequestParam("userID") String userID : @RequestParam을 이용해 매개변수가 userID이면 그 값을 변수 userID에 자동으로 설정
@RequestParam("userName") String userName : @RequestParam을 이용해 매개변수가 userName이면 그 값을 변수 userName에 자동으로 설정
loginForm.jsp의 action을 login2.do로 변경한다


2) @RequestParam의 required 속성 사용하기
로그인하는 경우 ID와 비밀번호 같은 정보는 반드시 컨트롤러에 전달되어야 한다.
@RequestParam의 required 속성을 이용하면 반드시 전달해야 하는 필수 매개변수인 경우와 그렇지 않은 경우를 설정할 수 있다.
- @RequestParam 적용 시 required 속성을 생략하면 기본값 true
- required 속성을 true로 설정하면 메서드 호출 시 반드시 지정한 이름의 매개변수를 전달해야 한다
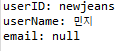
- required 속성을 false로 설정하면 메서드 호출 시 지정한 이름의 매개변수가 전달되면 값을 저장하고 없으면 null을 할당
LoginController.java
	@RequestMapping(value = "/test/login2.do", method = { RequestMethod.GET, RequestMethod.POST })
	public ModelAndView login2(@RequestParam("userID") String userID,
			                  @RequestParam(value="userName", required=true) String userName,
			                  @RequestParam(value="email", required=false) String email,
			                  HttpServletRequest request, HttpServletResponse response) throws Exception {
		request.setCharacterEncoding("utf-8");
		ModelAndView mav = new ModelAndView();
		mav.setViewName("result");

		System.out.println("userID: "+userID);
		System.out.println("userName: "+userName);
		mav.addObject("userID", userID);
		mav.addObject("userName", userName);

		return mav;
	}
loginForm.jsp
<!-- 로그인 클릭시 /test/login.do로 요청 -->
<form method="post"  action="${contextPath}/test/login2.do">
    <input  type="hidden"  name="email" value="newjeans@test.com" />
	<table width="400">
		<tr>
			<td>아이디 <input type="text" name="userID" size="10"></td>
		</tr>
		<tr>
			<td>이름 <input type="text" name="userName" size="10"></td>
		</tr>
	    <tr>
			<td>
			  <input type="submit" value="로그인">
			  <input type="reset" value="다시입력">
			</td>
		</tr>
	</table>
</form>
브라우저에 ID와 이름을 입력하고 로그인을 클릭하면 콘솔에 이메일 정보를 출력한다.
이메일관련 <hidden>태그를 추석 처리한 후 요청하면 이메일 정보를 null로 출력한다.
3) @RequestParam 이용해 Map 매개변수 값 설정
loginController.java
@RequestMapping(value = "/test/login3.do", method = { RequestMethod.GET, RequestMethod.POST })
	// @RequestParam을 이용해 Map에 전송된 매개변수 이름을 key, 값을 value로 저장
	public ModelAndView login3(@RequestParam Map<String, String> info,
			                   HttpServletRequest request, HttpServletResponse response) throws Exception {
		request.setCharacterEncoding("utf-8");
		ModelAndView mav = new ModelAndView();

		// Map에 저장된 매개변수의 이름으로 전달된 값을 가져온다
		String userID = info.get("userID");
		String userName = info.get("userName");
		System.out.println("userID: "+userID);
		System.out.println("userName: "+userName);

		// @RequestParam에서 설정한 Map 이름으로 바인딩
		mav.addObject("info", info);
		mav.setViewName("result");
		return mav;
	}
result.jsp
<body>
    <h1>아이디 : ${info.userID }</h1>
    <h1>이름   : ${info.userName }</h1>
</body>
로그인창에서 아이디와 이름을 입력한 후 로그인하면 /test/login3.do로 요청하여 결과를 출력한다.
4) @ModelAttribute 이용해 VO에 매개변수 값 설정
loginController.java
	@RequestMapping(value = "/test/login4.do", method = { RequestMethod.GET, RequestMethod.POST })
	// @RequestParam을 이용해 Map에 전송된 매개변수 이름을 key, 값을 value로 저장
	public ModelAndView login4(@ModelAttribute("info") LoginVo loginVO,
			                   HttpServletRequest request, HttpServletResponse response) throws Exception {
		request.setCharacterEncoding("utf-8");
		ModelAndView mav = new ModelAndView();

		System.out.println("userID: " + loginVO.getUserID());
		System.out.println("suerName: " + loginVO.getUserName());

		mav.setViewName("result");
		return mav;
	}
LoginVO.java
public class LoginVo {
	private String userID;
	private String userName;

	public String getUserID() {
		return userID;
	}
	public void setUserID(String userID) {
		this.userID = userID;
	}
	public String getUserName() {
		return userName;
	}
	public void setUserName(String userName) {
		this.userName = userName;
	}
}
5) @ModelAttribute 이용해 VO에 매개변수 값 설정
loginController.java
	@RequestMapping(value = "/test/login5.do", method = { RequestMethod.GET, RequestMethod.POST })
	public String login5(Model model,
			                   HttpServletRequest request, HttpServletResponse response) throws Exception {
		request.setCharacterEncoding("utf-8");
		model.addAttribute("userID", "hong");
		model.addAttribute("userName", "홍길동");
		return "result";
	}
result.jsp
..
<h1>아이디 : ${userID }</h1>
<h1>이름   : ${userName }</h1>
..
4. @Autowired 이용해 빈 주입하기
XML에서 빈을 설정한 후 애플리케이션이 실행 될 때 빈을 주입해서 사용하면 XML 파일이 복잡해지면서 사용 및 관리가 불편하다는 단점이 있다.현재 스프링에서는 @Autowired를 이용해서 개발자가 만든 클래스들의 빈을 직접 자바 코드에서 생성하여 사용한다.
@Autowired의 특징
- 기존 XML 파일에서 각각의 빈을 DI로 주입했던 기능을 코드에서 애너테이션으로 자동으로 수행
- @Autowired를 사용하면 별도의 setter나 생성자 없이 속성에 빈을 주입할 수 있다
참고 : ⌜자바 웹을 다루는 기술⌟ 책을 공부하며 요약・정리한 내용입니다.
'💻 Web_Back end > Spring' 카테고리의 다른 글
| 타일즈(tiles)란? (0) | 2023.05.28 |
|---|---|
| log4j란? (0) | 2023.05.27 |
| 스프링 트랜잭션 기능 (0) | 2023.05.22 |
| 스프링 JDBC 기능 (0) | 2023.05.16 |
| 스프링 MVC 기능 (0) | 2023.05.07 |